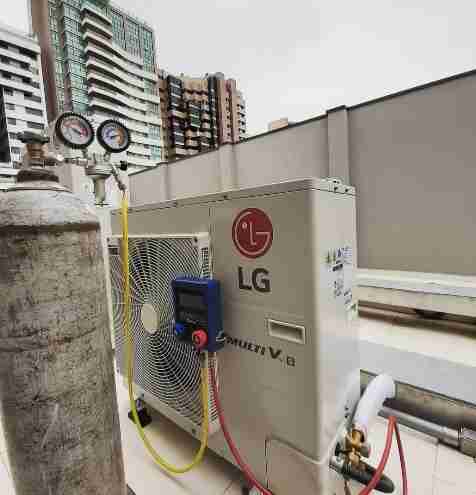
Variable Refrigerant Flow (VRF) systems are advanced HVAC solutions that offer superior energy efficiency and flexibility for commercial and residential buildings. However, like any complex system, they can encounter performance issues that require systematic troubleshooting. This guide provides a step-by-step approach to diagnosing and fixing common VRF system performance problems. Click here for more information VRF troubleshooting and repair
Step 1: Understanding VRF System Components and Operation
Before diving into troubleshooting, it’s essential to have a good understanding of the key components and operation of a VRF system:
- Outdoor Unit: Houses the compressor and is responsible for circulating refrigerant to indoor units.
- Indoor Units: Distribute conditioned air within the building. Each indoor unit can be individually controlled.
- Refrigerant Piping: Connects the outdoor unit to indoor units, allowing refrigerant to flow and adjust based on demand.
- Controllers: Manage system operation and allow users to set desired temperatures.
- Sensors: Monitor various parameters such as temperature, pressure, and refrigerant flow.
Step 2: Initial Inspection and System Check
Visual Inspection
- Inspect Outdoor Unit: Check for physical damage, obstructions around the unit, and ensure the condenser coil is clean.
- Inspect Indoor Units: Look for any signs of leaks, blockages, or physical damage.
- Refrigerant Lines: Ensure there are no visible leaks, kinks, or damage to the piping.
System Check
- Power Supply: Ensure that the system has a stable power supply and all electrical connections are secure.
- Controller Settings: Verify that the controllers are set correctly according to the desired operation mode and temperature settings.
Step 3: Diagnosing Common VRF System Problems
Problem 1: System Not Cooling or Heating Properly
- Check Refrigerant Levels: Low refrigerant levels can cause inadequate cooling or heating. Use a gauge to measure refrigerant pressure and compare it to the manufacturer’s specifications.
- Inspect Filters: Dirty or clogged filters can restrict airflow. Clean or replace filters in the indoor units.
- Sensor Issues: Faulty temperature sensors can provide incorrect readings, leading to improper system operation. Check sensor readings against actual room temperatures.
Problem 2: Unusual Noises
- Fan Issues: Inspect indoor and outdoor unit fans for debris or damage. Ensure they are spinning freely without obstruction.
- Compressor Noise: Loud or unusual noises from the compressor can indicate mechanical issues. This may require a professional HVAC technician to diagnose and repair.
Problem 3: System Leaks
- Refrigerant Leaks: Use a leak detector to identify any refrigerant leaks in the piping or connections. Repair any identified leaks and recharge the system with the appropriate refrigerant.
- Water Leaks: Check drain lines and condensate pans for blockages or damage. Ensure proper drainage to prevent water overflow.
Problem 4: Inconsistent Temperature Control
- Zoning Issues: Verify that zoning settings are correctly configured. Each indoor unit should be responding to its specific controller.
- Defrost Cycle: In heating mode, the system may periodically enter a defrost cycle, causing temporary temperature fluctuations. Ensure the defrost cycle is operating correctly.
Step 4: Advanced Troubleshooting
Using Diagnostic Tools
- Error Codes: VRF systems often have diagnostic tools that display error codes. Refer to the system’s manual to interpret these codes and identify specific issues.
- Thermal Imaging: Use thermal imaging cameras to detect temperature variations in the refrigerant lines, which can indicate blockages or leaks.
- Pressure Gauges: Measure suction and discharge pressures to ensure they are within the manufacturer’s recommended range.
Analyzing System Performance
- System Logs: Review system logs for any irregularities or patterns that might indicate underlying issues.
- Temperature Readings: Monitor temperature readings from various sensors to ensure they match expected values.
Step 5: Repair and Maintenance
Addressing Identified Issues
- Refrigerant Recharge: If refrigerant levels are low, repair any leaks and recharge the system to the correct levels.
- Component Replacement: Replace any faulty components, such as sensors, compressors, or fans, with manufacturer-approved parts.
- Cleaning and Maintenance: Regularly clean filters, coils, and other components to ensure optimal system performance.
Preventive Maintenance
- Scheduled Inspections: Implement a regular maintenance schedule to inspect and service the VRF system.
- System Updates: Keep the system’s firmware and software up to date to benefit from any performance improvements or bug fixes.
Step 6: Professional Assistance
If the above steps do not resolve the issue, or if the problem is beyond your expertise, it is advisable to seek help from a professional HVAC technician with experience in VRF systems. They can provide detailed diagnostics and advanced repair services.
Conclusion
Troubleshooting VRF systems involves a systematic approach to identifying and resolving performance issues. By understanding the system’s components, conducting thorough inspections, and using diagnostic tools, you can effectively diagnose and fix common problems. Regular maintenance and professional assistance when needed will ensure your VRF system continues to operate efficiently, providing reliable climate control for your building.


